Category Archives: Entrees

Summer Squash Blossoms stuffed with ricotta and herbs

Summer Squash Blossom Stuffed with Ricotta and Herbs

sweetheart squash blossomsI love the summer and always look forward to it coming.  I remember spending my days at the pool, having fun and relaxing.  Somehow, every year between September and June I forget the truth about summer, the busyness of it all and how quickly it flies by.  Driving kids back and forth to camp, rather than just getting them to the bus, spending more of the day out doors and at the pool, which is quite nice, but unfortunately leaves little time for food prep, cooking and clean up and even less time to photograph food, write about and post it right here.  So I’ve had a little hiatus from blogging, but now with the end of summer drawing near and the start of school and back to a more regular routine soon approaching, I’m looking forward to cooking and writing and I have a lot in mind.  Summer Squash Blossom

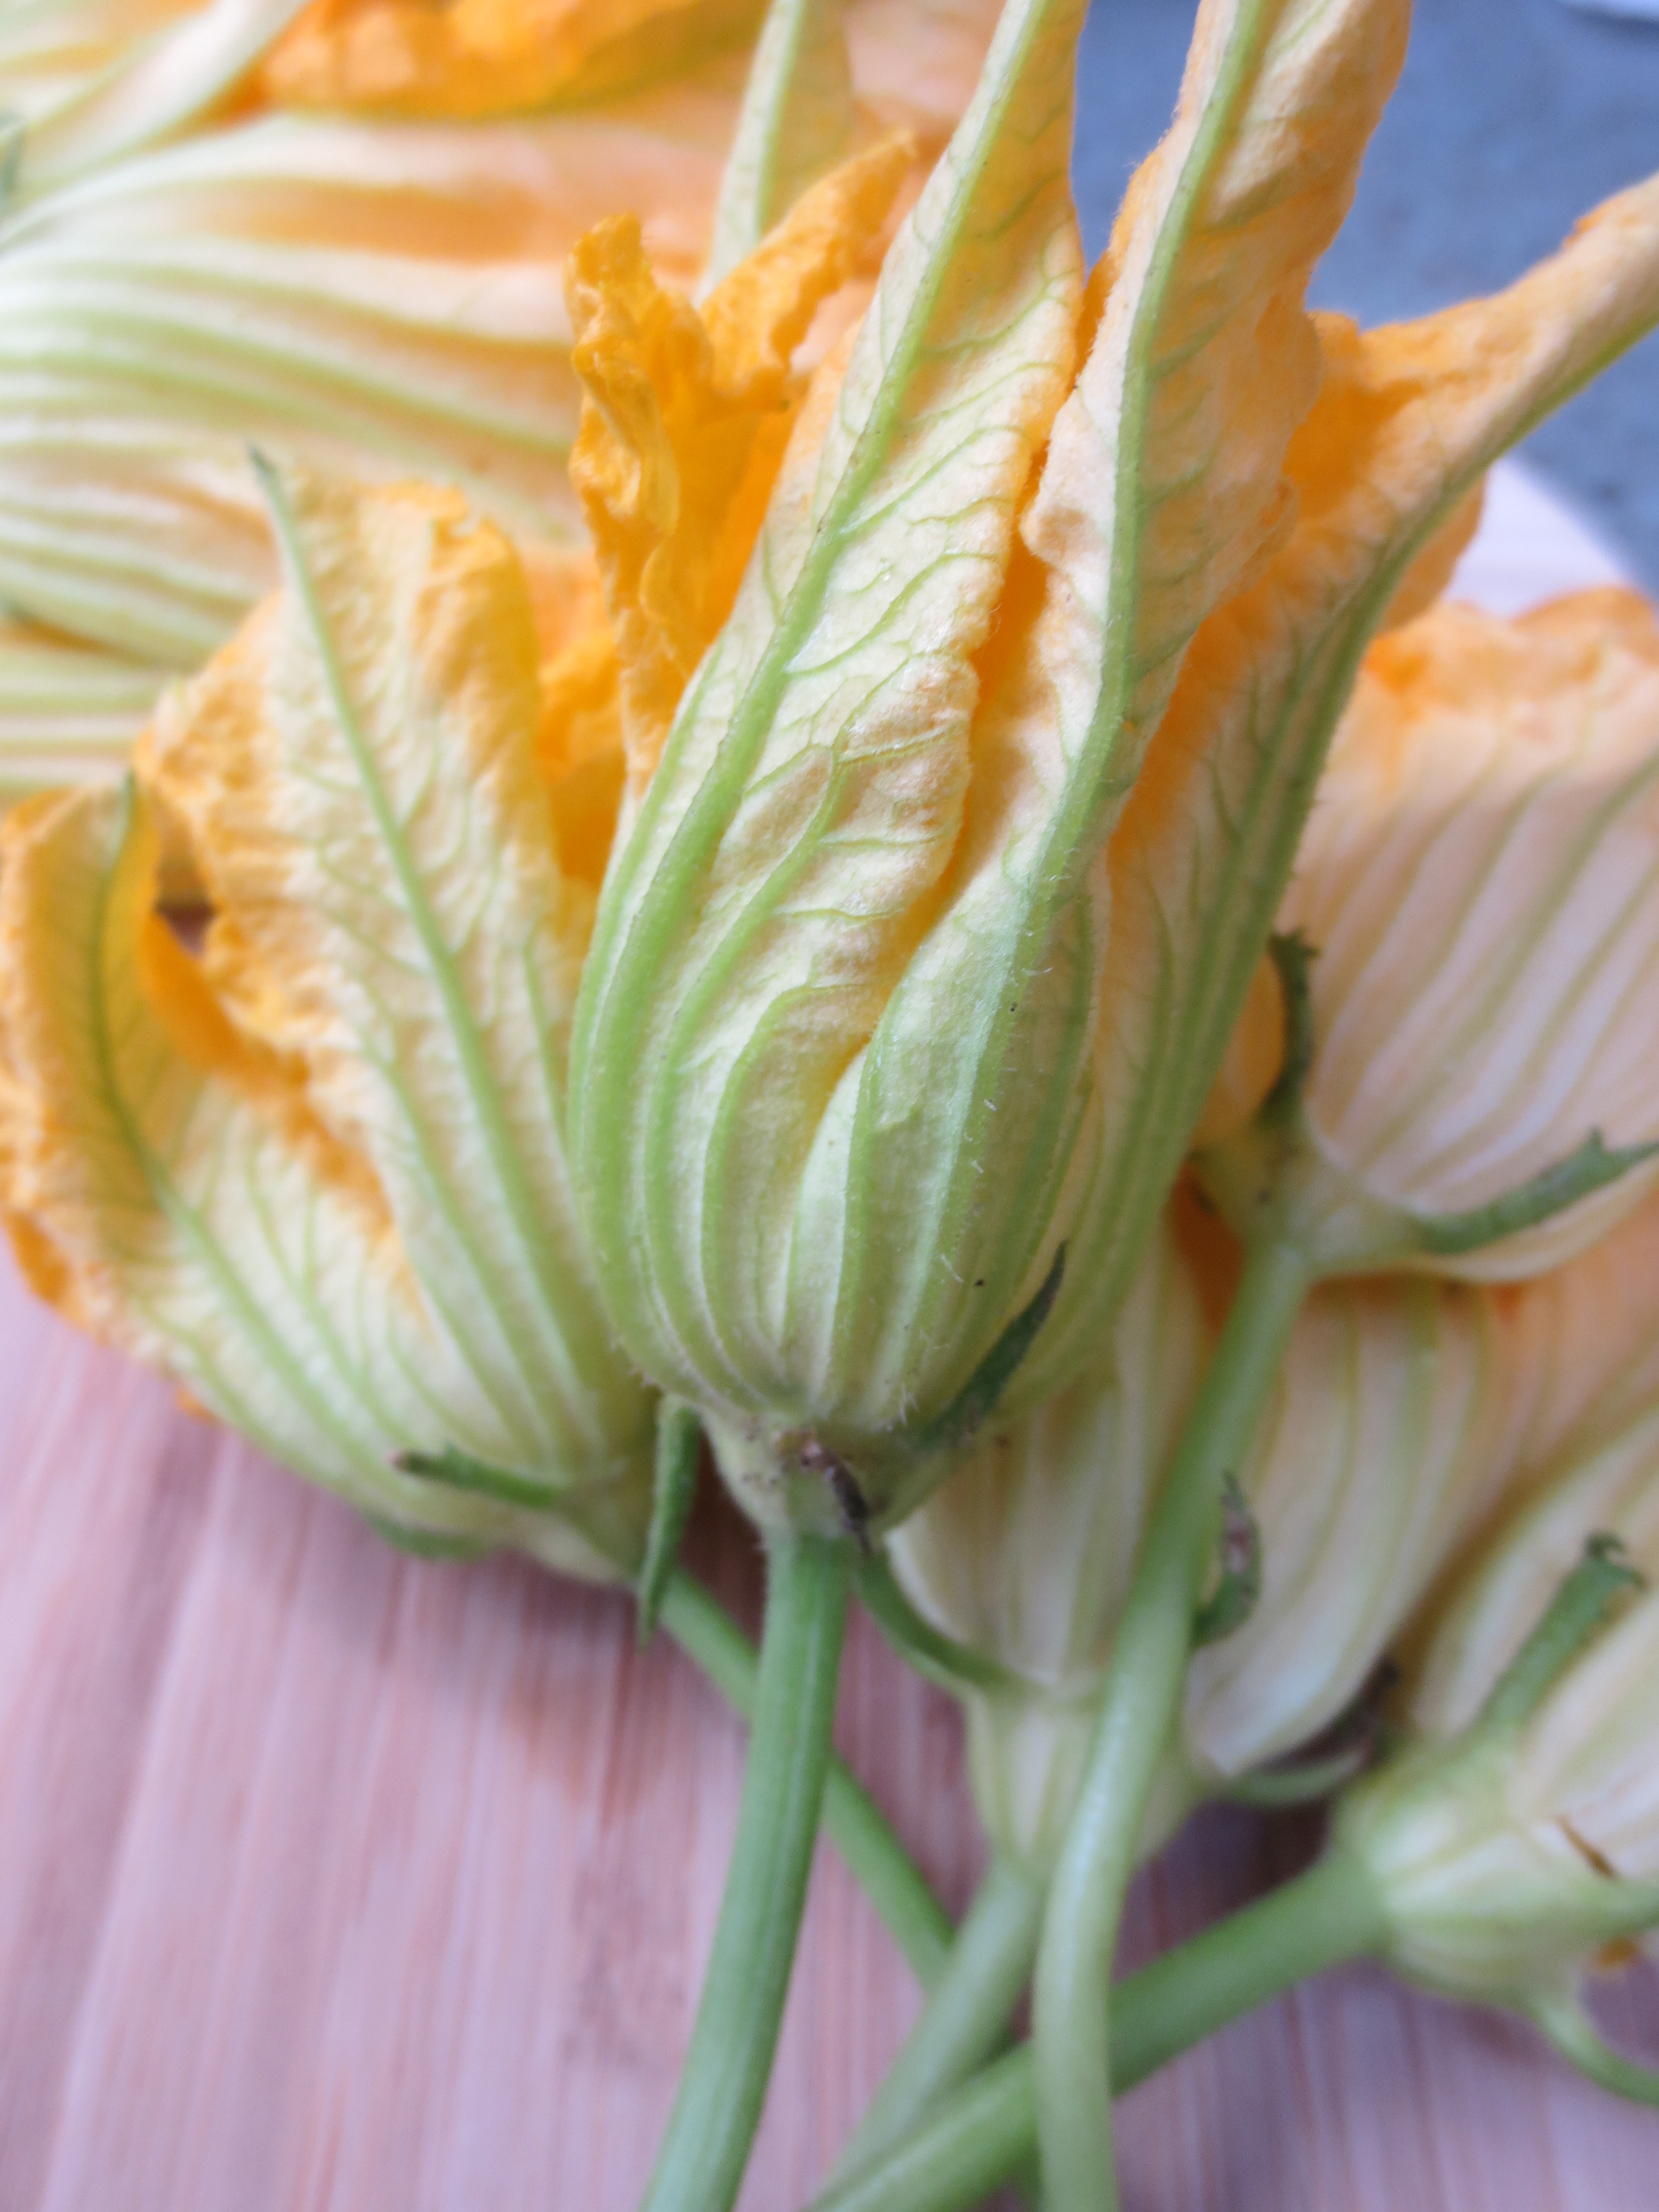
But, one of my favorite things about the summer is the special things I find at the farmer’s market, one of those being squash blossoms, special and fleeting, get to the local market quick while they last!  They may already be done for this year (although I found another batch at last week’s market), so something to look forward to.  Squash Blossom

First of all, let’s just start with the fun factor…giant flowers that you can eat, isn’t that enough to want to give these a try???  Now the less fun part…they are quite delicate, you need to have a little patience filling them and…they often can be found with little stowaways and occasionally one of those stowaways may even be a little stinging friend, so just be careful and carry on. 

The first thing I do when I get home from the market with a bag full of lovely blossoms is to take each one out of the bag individually, carefully open them up and give them a gentle shake over the sink, just to encourage any critters hanging out to escape.  If I’m not planning to prepare them right away I’ll just place them back in the bag with a paper towel to absorb any extra moisture and keep them happy a bit longer in the fridge.  It’s really best to use them within a day or two day of getting them, three days tops, as they wilt fairly quickly. 

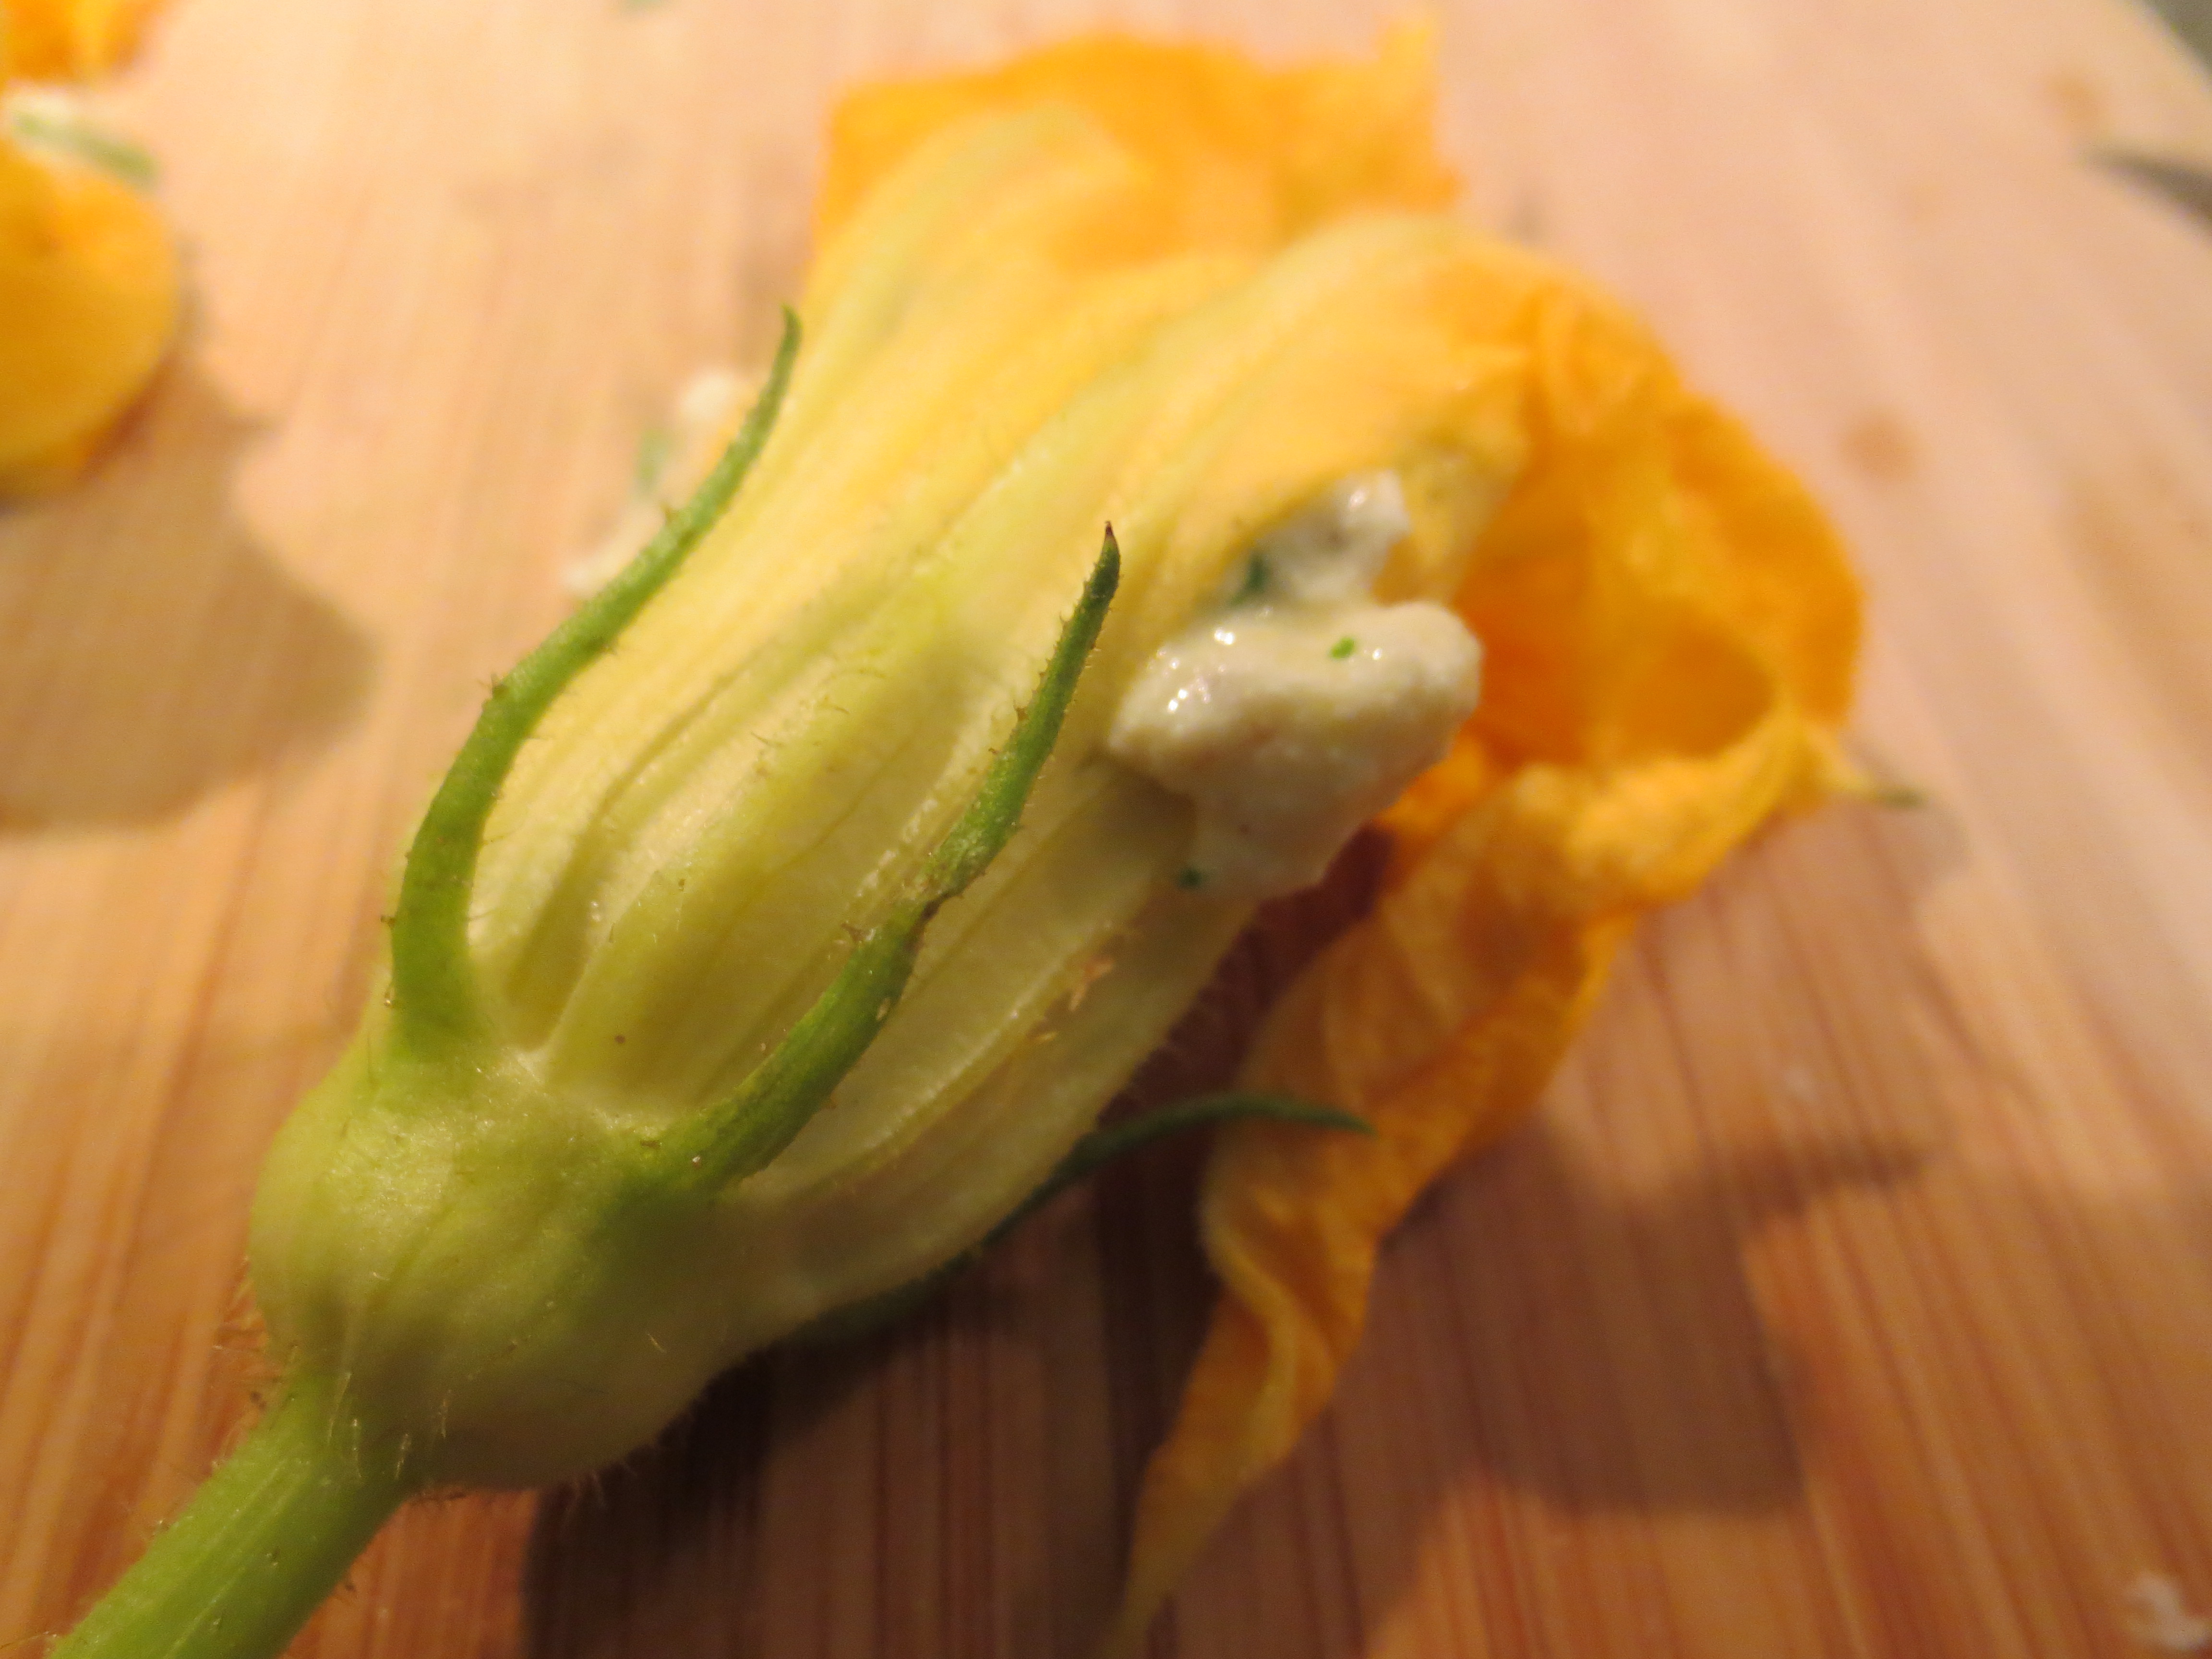
When I’m ready to prepare them, I reach inside each one and remove the stamen, which holds the sticky pollen.  I also cut off the stem just at the base of the flower, occasionally I’ll leave it on just for a prettier presentation, but I don’t eat it.  Then I prepare the filling and carefully spoon it in.  IMG_6090 Squash Blossoms stuffed

Stuffed Squash Blossoms all lined up
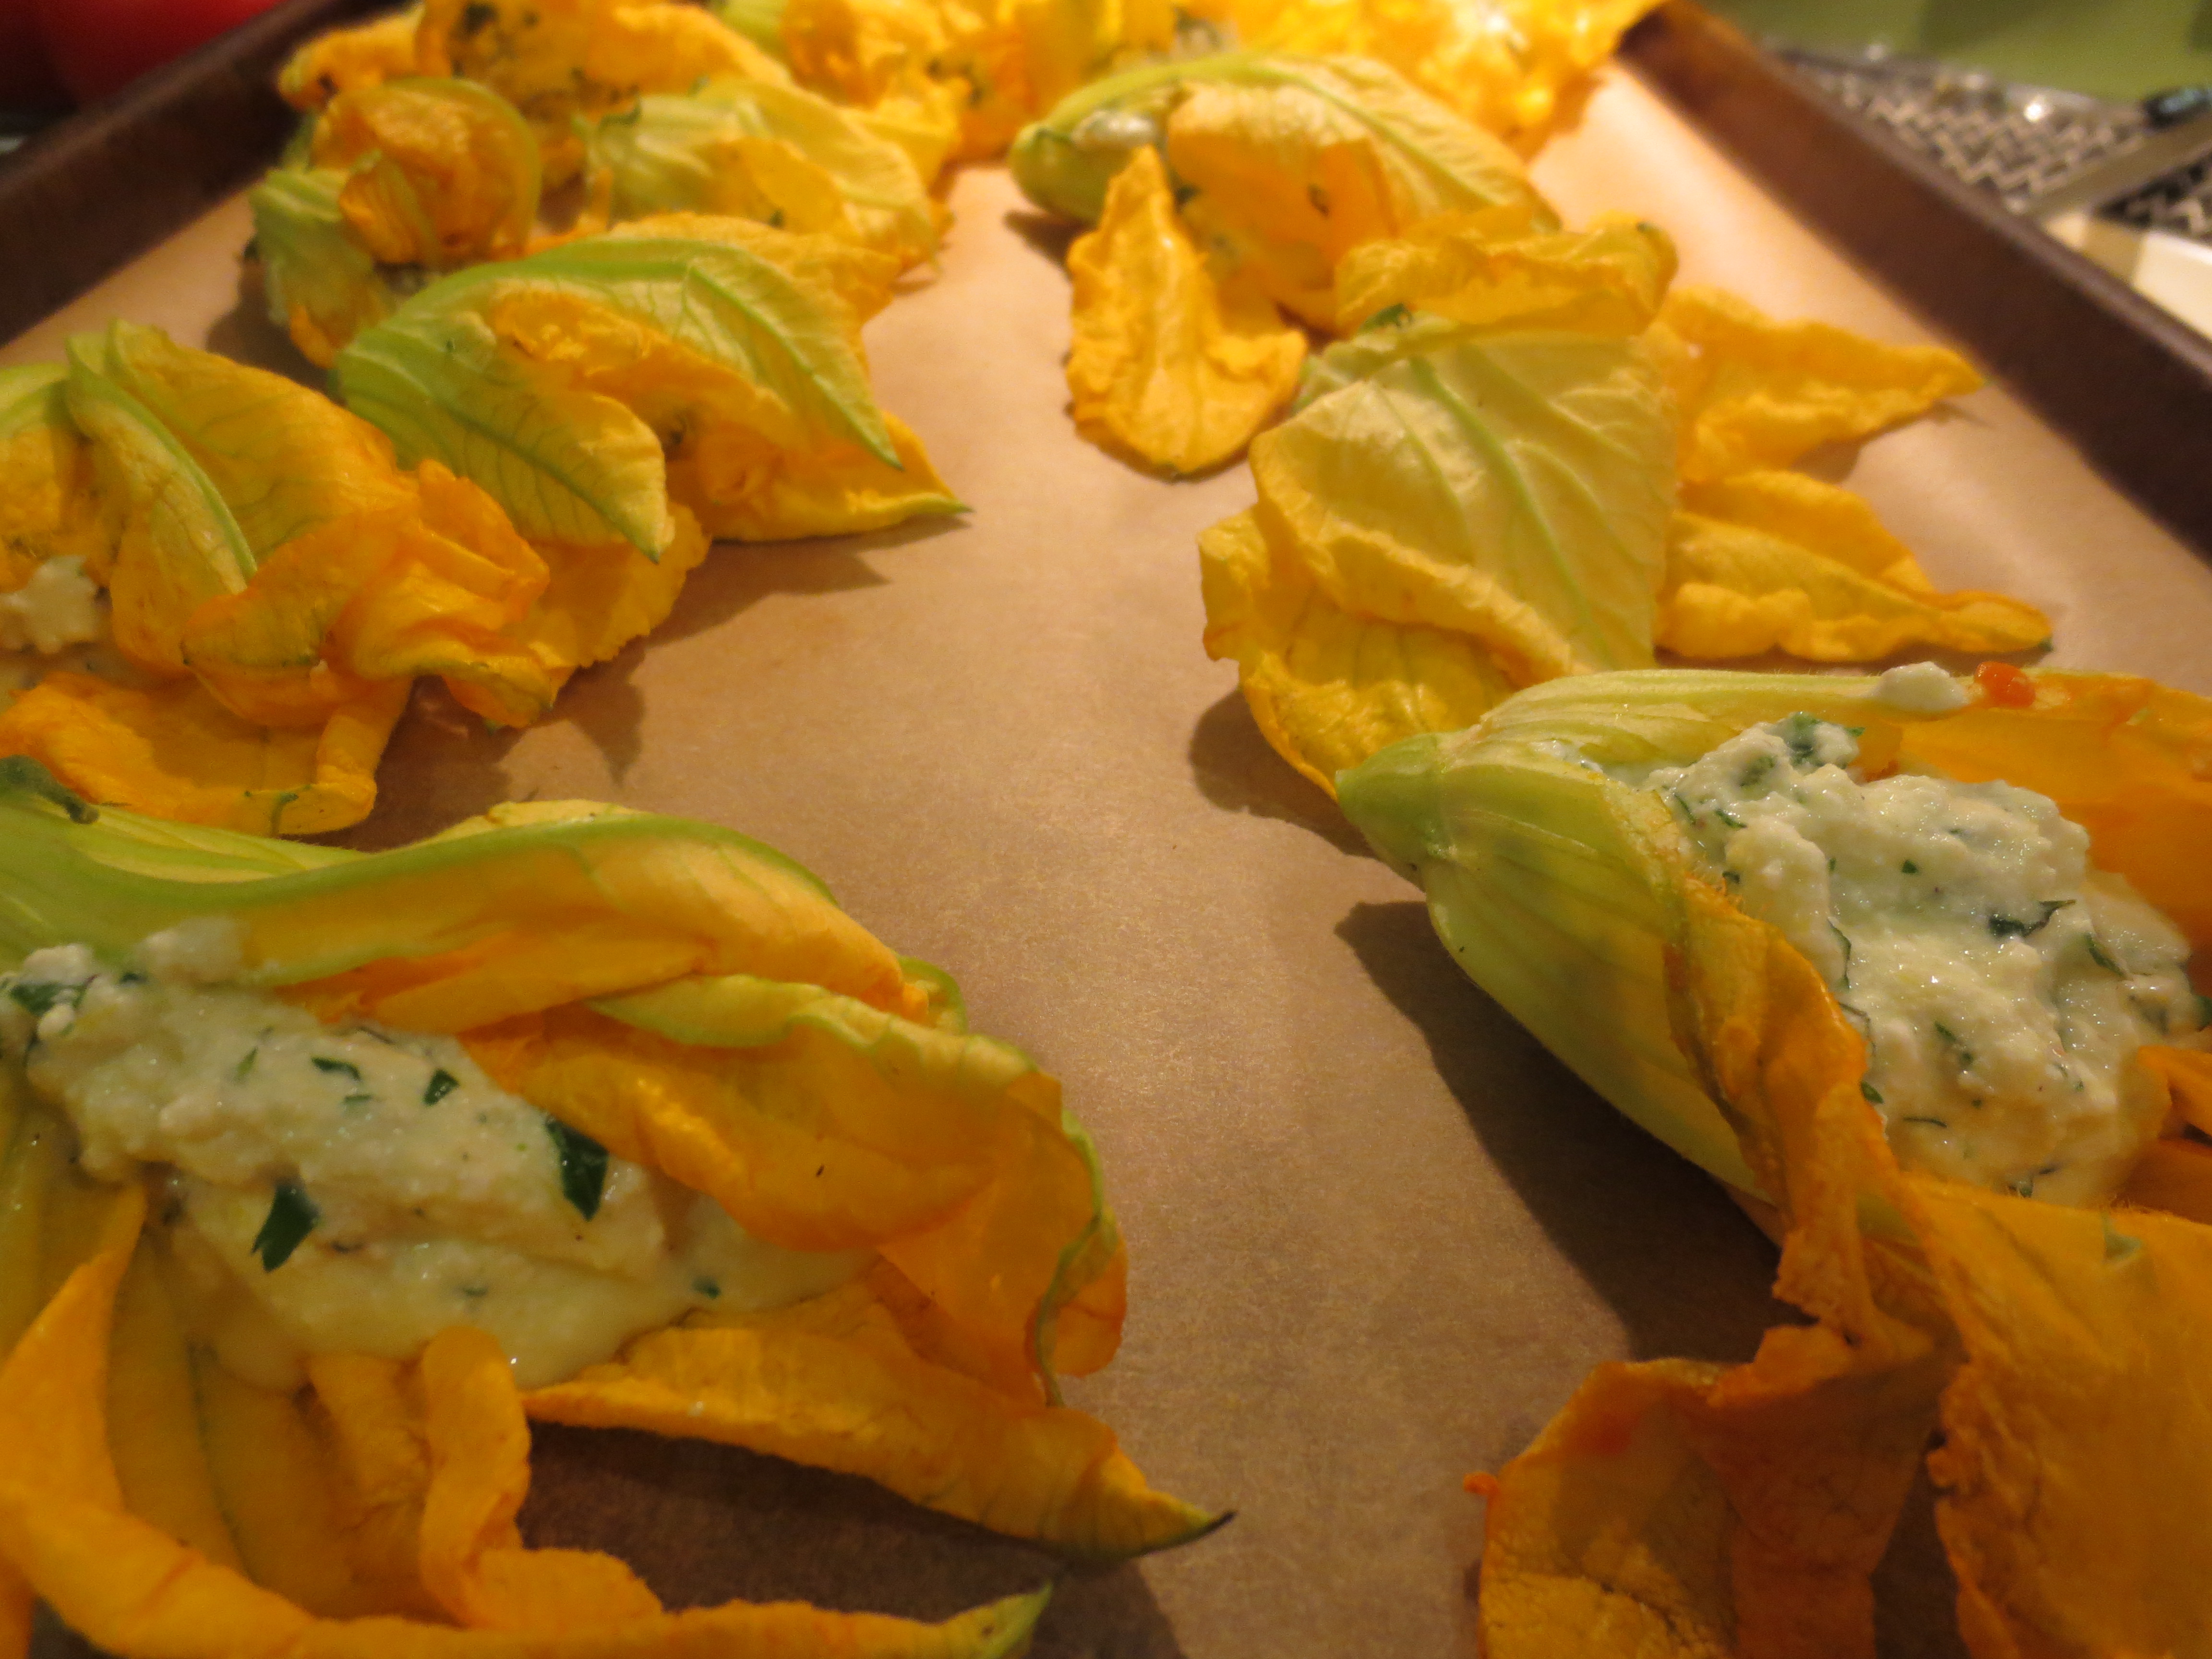
I have made these both cooked in oil in a sauté pan and also baked in the oven.  Both are quite good.  Cooking them on top of the stove certainly requires more hands on time while baking them is a bit quicker.  But I do find that cooking them on the stove as opposed to baking, leaves the filling just a bit more moist and creamy.  Either way, they are best eaten right away, leftovers while edible are definitely not as good. Cooked Stuffed Squash Blossoms tomato and herb saladThese make a great appetizer or as a light meal, I like to serve them with a little fresh tomato and herb salad, I don’t think any sauce is needed, but if a little of the tomato juice and dressing soak in I don’t complain.   Stuffed Summer Squash Blossoms

Summer Squash Blossoms Stuffed with Ricotta and Herbs

Author: Sweet Green Kitchen’s Jen Jones

 Ingredients:

Summer Squash Blossoms – about 16 – prepped by removing stamen, shaking out or brushing off any stow aways, and cutting off the stem or leave it on for presentation

Filling Ingredients: ricotta cheese and herb filling

1 cup Ricotta cheese

1 Egg

¼ cup chopped fresh herbs – see combo suggestions below

Zest of ½ Lemon

Fresh grated Nutmeg – a pinch, plus Salt & Pepper

Optional – 1/3 cup grated Locatelli Romano cheese

Coating Ingredients: squash blossoms rolled in breadcrumbs and cheese

3 Eggs

1/3 – ½ cup Bread Crumbs

1/3 – ½ cup grated Locatelli Romano cheese

Butter & Olive Oil – starting with 1 Tablespoon of each, adding more as needed

Optional: extra chopped fresh herbs mixed into bread crumbs & cheese

Fresh Herb Options:  I’ve used a variety of herb combinations when making this dish, but I always include parsley no matter what the other herbs are.  Some of my favorite combinations for this recipe are:   fresh herbs

Parsley, Mint, Chives, Basil

Parsley, Mint & Oregano

Parsley, Basil & Thyme

Parsley & Thyme

Or simply Parsley


Directions:

The filling – In a small bowl mix together the Ricotta, Egg, Fresh Herbs, Lemon Zest, Nutmeg, Salt & Pepper.  Next fold in the grated Romano if using.

In a larger shallow bowl (such as a shallow soup bowl or a pie plate), add the other three Eggs and beat well.

In a second shallow bowl, mix together the Bread Crumbs and grated Romano, plus the herbs if using.

Heat a large non stick skillet over a medium flame.  Add about 1 Tablespoon each Butter & Olive Oil, melt.

Now to stuff the Blossoms: Carefully open the petals and add a small spoonful of the Ricotta mixture into each blossom.

Next, dip each blossom into the beaten Eggs and then carefully coat with the breading and cheese mix.  Add blossoms to the hot skillet, about 4 or 5 at a time.  Cook until lightly browned on one side and then turn to brown the other side.  Remove from pan and add more blossoms until all are cooked, adding more butter & olive oil as needed.

Or, place on a parchment lined baking sheet and bake at 375 F for 15-20 minutes.

Serve warm as an appetizer, side dish or main course with a salad of mixed greens or fresh tomato and herbs dressed lightly with lemon and olive oil.  Enjoy!

Squash Blossoms stuffed

Recipe Notes: The filling is enough to stuff 16-20 blossoms, if you wish to make less I would still mix up the complete filling recipe and then… If I have any leftover filling and breading (I do as my mother always did, who learned it from my Italian Nana),I add them together, adding any extra of any of the ingredients if needed and then form a fritter and cook that in the same pan as the blossoms, a yummy little extra!

For printable version click here  plated squash blossoms with tomato herb salad

Farmer’s Market Frittata with crisp shitake mushrooms, spring onions & goat cheese

Farmer's Market Frittata
I love this time of year, when our local farmers markets are in full bloom.  I find the offerings of fresh and beautiful veggies so inspiring, I often get carried away and buy way too much!   Leaving with my bags loaded with more than we can usually eat in the week, happily planning meals in my head as I drive home. 
Farmer's Market Bounty

Farmer’s Market Bounty

This week I brought home spring onions with long green tops, more than a foot in length from Taliaferro Farms, shitake mushrooms from Madura Farms and herbed goat cheese from Acorn Hill, plus gorgeous eggs in shades of browns and blue from Wrights Farm which even inspired my five year old Evan to try “oval eggs” (hard boiled) for the first time ever!   WP_20140622_037
I cooked up this delicious and quick version of frittata, starting on the stove top and then finishing it under the broiler to get a nice golden brown top.  I used the spring onion tops, which I think are even more flavorful than the onions themselves and cook up quicker too.WP_20140622_014
I sprinkled bits of herbed goat cheese along with crisp cooked shitakes, all over the top just before placing under the broiler, but any goat cheese you like; flavored with herbs, garlic or just plain, would be delicious here.  Crispy Shitakes and Herbed Goat Cheese
If you can’t find young onions with the greens attached, scallions or leeks would work just as well.  In fact frittatas are so versatile you could really add most any combination of veges and cheese you like and come out with great results!  
Farmer’s Market Frittata
with Crisp Shitake Mushrooms, Spring Onions and Goat Cheese
 Author: Sweet Green Kitchen’s Jen Jones
Serves about 4 as a light main dish with a salad or other veggies on the side, also perfect for brunch with a warm crusty roll.
Ingredients:
5 or 6 Shitake Mushrooms
Spring Onion Greens (that’s the onion tops) from about 3-4 onions
Or sub with 2 bunches Scallions OR 2-3 Leeks
6- 8 Eggs (depending upon size)
Grated Asiago Cheese – about ¼ cup or more to taste
2 ounces creamy Goat Cheese
Butter and Olive Oil
Salt (flaked sea salt if you have)
Ground Black Pepper
 
Directions:
Heat a large non stick (oven safe) skillet (either a 10 or 12 inch pan will work) over a medium flame.
Wash, dry and slice the Shitake mushrooms.  Melt a bit of butter (about a teaspoon or two) into the skillet and then add in the mushrooms.  Sauté the mushrooms for several minutes until they get nice and crispy.  Once they’re crispy, sprinkle a little flaked salt and stir around and then remove from the pan.
While the mushrooms are cooking, clean and slice the green onion tops.
Into the same pan you’ve just removed the mushrooms from, add a little swirl of olive oil and then the onion greens.  Season with a little salt and pepper.  Sauté until softened and beginning to brown just a bit.
While the onion greens are cooking, whisk together the eggs in a medium bowl.  Season with salt and pepper and add about 2 tablespoons of the grated Asiago cheese.
Once the greens are cooked, spread them flat over the inside of the pan so they cover the entire surface, sprinkle with about a tablespoon of grated Asiago, then pour in the eggs and immediately lower the temperature to the lowest setting.  Do not stir.  Once the eggs just begin to set a bit, gently stir them around the pan.
Drop the goat cheese all over the eggs in small bits and then top with the crispy mushrooms and any remaining Asiago.  Remove the pan from the flame and place it in the oven about 4 – 6 inches from the broiler, turn on the broiler, watch carefully and allow to broil about 1 – 2 minutes until the top of the frittata sets and the cheese begins to brown.
Remove from the oven, cut into 4-6 portions, serve and Enjoy! 
Click here for printable versionFarmer's Market Frittata with Shitakes, Spring Onions and Goat Cheese


Fusilli con Broccoli with Creamy Ricotta Sauce

Fusilli Con Broccoli with Creamy Ricotta Sauce

When I was young, my Italian Nana would often make a recipe for me that I loved.  Long strands of twisted fusilli pasta with broccoli cooked in the same pot until it was so soft it nearly fell apart when I ate it.  The salted water with the broccoli and pasta would develop a lovely brothy flavor which would be ladled into the bowl with the rest and then topped with some grated Romano cheese.  It was delicious and to this day I still dream of it.  Here I’ve cooked the fusilli and broccoli a bit more al dente, although the broccoli still is quite tender, and I added a creamy light ricotta “sauce”.  Eating this now reminds me of my Nana.  As the say in Italy, Buon Appetito!  Pasta with Ricotta Sauce

 IMG_5123

Fusilli con Broccoli with Creamy Ricotta Sauce

Author: Sweet Green Kitchen’s Jen Jones

Ingredients:

1 pound pasta – fusilli or other shape, orecchiettie is also good

1 cup Ricotta cheese

Handful of chopped Parsley or Basil

Grated Romano cheese

Grated Ricotta Salata cheese

Zest of ½ Lemon

3 cloves Garlic – chopped

Olive oil

Salt

Hot Red Pepper Flakes or Black Pepper

1 bunch of Broccoli florets, cut to bite size pieces

Directions:

Cook pasta until al dente in salted water, making sure to reserve some of the cooking liquid for the sauce.  During the last 2 minutes, add the chopped Broccoli to the pot and stir around.   IMG_5099


While the pasta cooks, in a small saucepan add the chopped garlic, a pinch of salt and olive oil to cover.  Warm over low heat, to infuse the oil with garlic flavor and gently cook the garlic.  – this step is optional and can be skipped if you’re not a huge fan of garlic, but I think it adds a great extra layer of flavor to the finished dish.

Also, while the pasta cooks, to a large serving bowl add Ricotta, Parsley or Basil, grated cheeses and Lemon Zest.  Mix together. Ricotta Sauce

Add the cooked Pasta and Broccoli to the Ricotta mixture adding in some reserved pasta liquid a little bit at a time, until the sauce is the consistency you like.  Pour the infused Olive Oil and Garlic over the Pasta and top with a bit of Red Pepper flakes or ground Black Pepper, whichever you prefer.  Finish with a little extra grated Cheese if you like.  Serve warm and Enjoy!

IMG_4682Pasta with Broccoli and Creamy Ricotta Sauce

Recipe Notes:  I love the lemon zest in this sauce but if you’re not a fan, feel free to skip it.  In it’s absence I would add a little nutmeg. 

Click here for printable version


Spanikopasorta

IMG_4434 Spanikopa Sorta

Spanikopasorta

Author: Sweet Green Kitchen’s Jen Jones

I adapted this from the Barefoot Contessa’s recipe for Spanikopita, I made quite a lot of changes; adding ricotta cheese, changing the herbs, swapping her scallions for leeks, eliminating bread crumbs and of course using a LOT less butter and olive oil, until it no longer seemed as much a spanikopita as it seemed sort of spanikopita, sort of not, so it became Spanikopasorta.  Unlike a traditional spanikopita which is layered and baked as more of a casserole, this is rolled up roulade or struedel style.

I like this served with either a green salad or tomato salad, either way great for lunch or dinner served hot or at room temperature.  This would also make a great party appetizer or hors d’oeuvres.

Makes 2-3 roulades/struedels

Ingredients:

2 Leeks – washed and sliced – white and tender green

2 Garlic Cloves – chopped

1-2 teaspoons Olive Oil

1-2 teaspoons Butter

1 10-ounce package Frozen Spinach – defrosted

1 cup Ricotta cheese (whole or part skim) – half of a 16 ounce container

¼ cup Parsley – flat leaf – chopped

2 Extra Large Eggs

6 ounces Feta cheese – chopped and crumbled (do not use pre-crumbled)

¼ – ½ teaspoon ground Nutmeg

Fresh Thyme – a few sprigs

Salt & Pepper

Phyllo Dough – about 20 sheets, more or less

Melted Butter – about 3 Tablespoons

Directions:

Preheat oven to 400 F

Heat Olive Oil and Butter in a large non stick sauté pan.  Add the chopped Leeks, cook for a few minutes and then add in the chopped Garlic.  Continue cooking until the Leeks are softened and browned a bit on the edges, but not completely.IMG_4384 Chopped Leeks for Spanikopa SortaIMG_4386 Sauteed Leeks and Garlic

Meanwhile, squeeze out the water from the Spinach.  Turn off the heat and add the Spinach to the pan with the Leeks and Garlic and toss around a bit.IMG_4797

In a medium to large bowl, add the Ricotta, chopped Parsley, Eggs, crumbled Feta cheese, Nutmeg, Thyme leaves, Salt and Pepper.  Stir to combine and then add in the slightly cooled Spinach, Leeks and Garlic, stir again. IMG_4390 Chopped Parsley for Spanikopa SortaIMG_4804IMG_4808

Lay out 2 sheets of Phyllo and brush all over with a little bit of melted Butter, then continue layering 2 sheets at a time with butter brushed in between until you have used 10 sheets.IMG_4811

To make Struedel style – Spoon either 1/3 or 1/2 of the Spinach & Cheese mixture down the center of the Phyllo stack, leaving about 1 inch at each short end without filling. Fold over the two sides and then wrap one long end over the filling and finish by folding the last end over the top and brush with a little more butter to seal.  Carefully move struedel to a baking sheet. IMG_4813

To make Roulade style – Spoon either 1/3 or 1/2 of the Spinach & Cheese mixture to cover the whole sheet of Phyllo, leaving a border about 1 inch around.  Next fold over the short ends and then begin rolling the Phyllo over the filling, finishing with a little brush of melted Butter.  Carefully move to a baking sheet.

Repeat with remaining Phyllo and filling until you have 2 or 3 roulades or struedels.  Whether you end up with 2 or 3 is merely a matter of personal preference, depending on your preferred ratio of filling to pastry.

Bake at 400 degrees F for about 20 minutes.   Divide each struedel into slices 1-2 inches thick or larger pieces if you prefer.  Serve hot or at room temperature.  Enjoy!   IMG_4439 Spanikopa Sorta


Recipe Notes:

Leeks – most recipes instruct to use just the white and light green parts of the leek, but I really prefer to use almost the whole leek including the darker green.  I slice through most of the leek and as I get toward the dark green less tender end, I peel away the outer layers and then continue to slice through the more tender inner layers.

Phyllo dough is sold frozen, not be confused with puff pastry.  Phyllo is thin and papery.  It tends to dry out quickly, so I just unroll as many sheets as I need for the moment, leaving the rest wrapped until needed.   

Click here for printable version 


Tofu Summer Rolls with Miso Dipping Sauce

IMG_5004 Tofu Summer Rolls with Misco Cashew Dipping Sauce

Tofu Summer Rolls

Author: Sweet Green Kitchen’s Jen Jones

These summer rolls are so flavorful, light and fresh tasting, perfect for the warm days of Spring and Summer.  They make a great appetizer or party hors d’oeuvres and are perfect as a light lunch or dinner served alongside a nice salad or Asian slaw.

Ingredients:

1 12-ounce package of Extra Firm Tofu – drained and pressed

1 Avocado – thinly sliced

1 Mango – thinly sliced

Fresh Mint leaves

Baby Arugula

Rice Paper a.k.a. Spring Roll Wrappers

Flaked Sea Salt (or other Salt)IMG_4955

IMG_4958

Miso Marinade/Dipping Sauce Ingredients:

 1 Tablespoon White Miso

1 Tablespoon lite Soy Sauce or Wheat Free Tamari (to make it gluten free)

2 Tablespoons Apple Cider or Rice Vinegar (or 1 Tablespoon of each)

2 teaspoons Honey, Agave or Maple Syrup (Agave or Maple to make it Vegan)

1/4 teaspoon (more or less to taste) Sriracha Sauce

1 Tablespoon Olive or Sesame Oil

IMG_4949 Miso Cashew Dipping Sauce

 Alternate (Miso Cashew) Dipping Sauce Ingredients:

1 Tablespoon Cashew Butter (Almond or Peanut Butter would also be good)

1 Tablespoon White Miso

1 Tablespoon Apple Cider Vinegar

2 teaspoons Honey or Agave Syrup

1 teaspoon lite Soy Sauce or Tamari

1 teaspoon Water

1/4 teaspoon (more or less to taste) Sriracha Sauce

A sprinkling of white or black Sesame Seeds – optional


Directions:

Starting with drained and pressed Tofu, slice the Tofu block into approximately 8 even slices and the then halve each slice lengthwise, leaving you with about 16 strips.  Season lightly with salt.

Meanwhile heat a large non stick pan and drizzle a bit of oil (I use olive, canola or coconut oil).

Saute each piece of Tofu over a medium to high flame, adjusting temperature as needed, until golden brown on both sides.  Beware of splatters when cooking.

IMG_4715 Golden Tofu in Miso MarinadeWhilst cooking the tofu, prepare the Miso Marinade.  Add the cooked Tofu to the Marinade and refrigerate for at least 30 minutes to a few hours or even overnight.  Refrigerating the cooked tofu allows the texture to firm up and also gives it time to absorb the flavors of the marinade.

To make the Summer Rolls:

Fill a pie dish or other similarly sized bowl with warm water.  Working one at a time, soak 1 Rice Paper wrapper in the water until it softens.  Beware, if you’ve never worked with rice paper wrappers before, they are delicate and prone to tearing, but don’t worry about small tears they should still wrap up fine.

On a flat surface, like a cutting board lay out the softened Rice Paper (you can place a paper towel on top of your board if you like to help absorb a bit of extra moisture and prevent it from sticking to your board).

Begin to layer your filling – start with 2 -3 leaves of Mint placed vertically down the center of the rice paper.  Next, line up 2 slices of tofu on top of the Mint, then 2 slices of Mango and 2 slices of Avocado, finishing with a small handful of Arugula and a little sprinkle of flaked Sea Salt.IMG_4970 IMG_4993IMG_4988

IMG_4981Now to wrap, if you’ve ever rolled up a burrito this is very much the same.  Start by folding up the ends over the filling, then , fold up one side over all the filling tucking it to make it tight, then roll the whole thing over the last end until it is completely wrapped, tucking as you go to make a nice tight roll.  Using a sharp knife cut the roll in half (I like an angled cut).  Now repeat.

Place the completed rolls on a platter until done and then serve with either the leftover marinade or the miso cashew dipping sauce.  Enjoy!

Recipe Notes:  These rolls take a little pre planning as you need to first cook and marinate the tofu before moving on to make the rolls, if you want to save time, you can use already baked and marinated pre-packaged tofu. 

Click here to view printable version

IMG_5012 IMG_4996